


- Home /
- Oral Surgery /
- Dental Implants
Dental Implants
Dental Implant
What Is a Dental Implant?
A dental implant is a small screw made of pure titanium that is placed into the jawbone, taking the place of the root of a lost tooth. After osseointegration (3–4 months), a crown, bridge or denture is fitted onto it — and the result looks and functions like a natural tooth.
When Implants Are Recommended
- When a single tooth has been lost
- For multiple missing teeth (fixed implant bridges)
- For full edentulism (All-on-X — full arch on 4–8 implants)
- To stabilise a denture (implant-supported overdenture)
- When you don't want to grind down adjacent teeth for a bridge
The Procedure Step by Step
Diagnosis & digital planning:
Complete clinical examination, 3D X-ray (CBCT) and digital pre-planning of the implant's exact position.
Implant placement:
A small surgical procedure under local anaesthesia, lasting 30–60 minutes per implant. The implant is placed into the bone through a small incision in the gums — or, with guided surgery, with no incision at all (flapless).
Healing phase (osseointegration):
3–4 months for the lower jaw, 4–6 months for the upper. During this phase, the implant fuses with the bone. You'll usually wear a temporary restoration.
Impression & crown/bridge fabrication:
Digital or conventional impressions. The final restoration is fabricated by a specialised dental laboratory.
Placement of the final restoration:
The crown is screwed or cemented onto the implant. From this moment, you use the “tooth” completely normally
Advantages over Bridges or Dentures
- Adjacent teeth aren't affected
- Preserve the jawbone (prevent bone loss)
- Natural chewing feel — eat what you used to with your natural teeth
- 15–25+ year lifespan, often lifelong
- Excellent aesthetics, especially on front teeth
- No impact on speech or daily life
Guided Implant Surgery with a Surgical Guide
What Is a Guided Implant Surgery with a Surgical Guide?
Guided implant surgery is the most modern and precise technique in implantology. At Dentistar Dental Clinic, we digitally study and plan the entire case before surgery, and fabricate a custom surgical guide that directs the implant into the exact pre-planned position — with millimetre precision.
When Implants Are Recommended
- When a single tooth has been lost
- For multiple missing teeth (fixed implant bridges)
- For full edentulism (All-on-X — full arch on 4–8 implants)
- To stabilise a denture (implant-supported overdenture)
- When you don't want to grind down adjacent teeth for a bridge
- For complex or multiple implants
- For All-on-X restorations
- In patients with limited bone volume
- In cases near the inferior alveolar nerve or maxillary sinus
- When immediate loading with a pre-made crown is desired
How Guided Placement Works
Digital data acquisition:
We take a 3D X-ray (CBCT) of the jaw and a digital impression of the mouth.
Digital planning:
We merge the data in specialised software and virtually plan the ideal position, angle and depth of the implant — taking into account bone, adjacent teeth, nerves and the final crown.
Surgical guide fabrication:
Based on the digital plan, a custom 3D-printed guide is produced. It fits precisely in your mouth and “guides” the drill into the exact pre-planned position
Surgical placement:
The guide is placed in the mouth and the implant goes into the correct position, often without opening the gums (flapless) — with less discomfort and faster healing.
Benefits of Guided Surgery
- Millimetre precision — the implant position is predictable
- Maximum safety near nerves and sensitive structures
- Minimally invasive (often flapless — no incision)
- Shorter surgery time
- Less swelling and faster recovery
- Ideal for complex cases and multiple simultaneous implants
- Allows pre-fabrication of the temporary crown before surgery
Immediate Extraction and Immediate Implant Placement
What Is Immediate Extraction and Immediate Implant Placement?
Immediate implant placement is a modern technique where we remove the problem tooth and place the implant in the same session — directly into the socket of the just-extracted root. In selected cases, a temporary crown is also fitted on the same day (immediate loading), so you leave the clinic with a natural-looking tooth from the very first moment.
When Implants Are Recommended
- When a single tooth has been lost
- For multiple missing teeth (fixed implant bridges)
- For full edentulism (All-on-X — full arch on 4–8 implants)
- To stabilise a denture (implant-supported overdenture)
- When you don't want to grind down adjacent teeth for a bridge
How Immediate Implant Placement Works
Planning & assessment:
Using a 3D X-ray (CBCT), we check that the quantity and quality of the bone around the root are sufficient for immediate implantation.
Atraumatic extraction:
The tooth is removed using special atraumatic techniques, so the surrounding bone remains intact.
Immediate implant placement:
The implant is placed into the socket of the extracted root, in the same session.
Gap filling & bone grafting:
Where needed, we fill the space around the implant with bone graft material, for optimal fit and aesthetic outcome.
Temporary crown (where indicated):
In favourable cases (good initial implant stability), we immediately fit a temporary crown — so you're never without a tooth.
Benefits of Immediate Implantation
- One procedure instead of two — less time, less stress
- Faster overall treatment (up to 3–4 months shorter)
- Better aesthetic outcome, especially in front teeth
- Possibility of never being without a tooth (immediate loading)
- Reduced bone resorption in the area
When Immediate Placement Is Recommended
- In cracked or unrestorable teeth
- In failed endodontic treatments
- In prosthetic failures (e.g. broken crown with non-restorable root)
- When sufficient bone is present and no active infection exists
- When the surrounding gums are healthy
When Immediate Placement Is NOT Recommended
- Active infection or abscess in the area
- Severe bone loss
- When implant stability cannot be achieved
- In patients with uncontrolled diabetes or other risk factors
In these cases, we follow the classic, staged approach: extraction → healing → implant after 2–4months, for an optimal and safe outcome.
All-on-X — Full Arch Rehabilitation
What Is All-on-X — Full Arch Rehabilitation?
All-on-X is the umbrella term for full-arch implant rehabilitation — replacing every tooth in an upper or lower jaw with a fixed bridge supported by a small number of strategically placed implants. “X” stands for the number of implants used, depending on the patient’s bone, bite forces and aesthetic needs. At Dentistar Dental Clinic, All-on-X gives patients with severe tooth loss, failing dentitions or worn-out dentures the chance to leave the clinic the same day with a complete, fixed set of teeth —restoring full chewing function, facial structure and confidence.
The All-on-X Family of Treatments
All-on-4
Four implants per arch — two placed vertically at the front and two angled at the back (typically up to 45°) to avoid the sinus or nerve and gain longer anchorage. This is the most established protocol globally and is often the first-choice option for moderate-to-severe bone loss
All-on-5
A middle-ground configuration with five implants per arch. The extra implant in the centre adds stability for patients with strong bite forces or a slightly compromised bone profile.
All-on-6
Six implants per arch, distributed evenly. Preferred when bone quality allows, in patients with strong chewing forces (bruxers), or when a longer span between implants would otherwise be required. Greater redundancy and load distribution.
All-on-8 (Maxilla)
Eight implants in the upper jaw, used in select cases where bone is sufficient and a more traditional, even support is preferred — particularly under porcelain or zirconia full-arch bridges.
The All-on-X Protocol Step by Step
Comprehensive consultation & 3D planning:
CBCT scan, intraoral scan, digital smile design and full-arch treatment plan. We pre-plan every implant position virtually.
Surgical phase:
Under local anaesthesia (and optionally light sedation), we extract any remaining unrestorable teeth, place the implants in the digitally planned positions — often with a surgical guide — and add bone graft where needed.
Immediate temporary bridge (same day):
Where possible, a pre-fabricated PMMA bridge is screwed onto the implants the same day. You leave with teeth — not gauze.
Healing & soft diet phase:
Soft diet for 6–8 weeks. Most patients return to almost normal activities within 3–5 days.
Final bridge (3–6 months later):
Once integration is confirmed, the definitive bridge — zirconia, hybrid or porcelain — is delivered. This is the long-term restoration.
Long-term maintenance:
Professional cleaning every 4–6 months. Annual review with X-rays. A well-cared-for All-on-X bridge can last 15–25+ years
Fixed vs Removable Full-Arch Options
Fixed full-arch bridge (the typical All-on-X)
- Permanently screwed to the implants — only the dentist removes it
- Feels and functions like natural teeth
- Maximum stability and chewing force
- Reduced bone resorption in the area
Implant-supported overdenture (alternative for tighter budgets)
- Removable by the patient for cleaning
- Snaps onto 2–4 implants with locator attachments or a bar
- More affordable than a fixed bridge
- Significant improvement over a conventional denture
Immediate Loading ("Teeth in a Day")
When initial implant stability is sufficient, we can deliver a fixed temporary bridge on the same day as the surgery. You leave the clinic with a full set of teeth — eating soft foods within hours. The final, definitive bridge is fitted 3–6 months later, after the implants have fully integrated.
Materials for the Final Full-Arch Bridge
- PMMA (acrylic on titanium bar) — used for the immediate/temporary bridge
- Hybrid acrylic-titanium — durable, repairable, more affordable as a long-term option
- Porcelain-fused-to-metal — strong, classic aesthetics
- Monolithic zirconia — top-tier strength, biocompatibility, stain resistance and lifelike appearance (often the long-term choice at Dentistar)
Who Is a Candidate for All-on-X?
- Patients with all or most teeth missing in one or both jaws
- Patients with terminal dentition (multiple unrestorable teeth)
- Patients struggling with loose, painful or ill-fitting dentures
- Patients with advanced periodontitis who want a fresh, fixed solution
- Healthy adults with sufficient bone (or addressable bone deficits)
Bone Grafting for Dental Implants
What Is Bone Grafting for Dental Implants?
After tooth loss — especially when teeth have been missing for years — the jawbone gradually resorbs. To place an implant safely, we sometimes need to rebuild the bone first or simultaneously. At Dentistar, we use a range of modern bone graft materials, chosen specifically to match the size of the defect, the location and the desired healing time.
Why Bone Grafting Matters
An implant needs adequate bone height, width and density to integrate successfully and support biting forces for decades. Without sufficient bone, the implant may be poorly positioned, exposed at the neck, fail to integrate or compromise the aesthetic result.
Types of Bone Graft Materials
Autograft — Your Own Bone
Bone harvested from another site in your own body (chin, lower jaw ramus, or — for larger defects— hip or tibia). The gold standard for biological behaviour: contains living cells, growth factors and excellent integration. Drawback: an extra surgical site is involved.
Allograft — Processed Human Donor Bone
Sterilised and processed bone from human tissue banks. No second surgical site needed. Acts as a scaffold that your own bone gradually replaces. Widely used, with strong long-term research.
Xenograft — Animal-Derived Bone
Most commonly bovine (e.g. Bio-Oss), occasionally porcine origin. Highly purified to remove all organic content, leaving a biocompatible mineral scaffold. Extremely slow-resorbing — excellent formaintaining volume in aesthetic zones and sinus lifts.
Alloplast — Synthetic Bone Substitute
Lab-made materials such as beta-tricalcium phosphate (β-TCP), hydroxyapatite or bioactive glass. Nobiological origin, eliminating any concerns about disease transmission. Predictable resorptionprofiles, available in particulate or block form.
Combination Grafts
Often we combine materials to get the best of each — for example, autograft (for biological activity)mixed with xenograft (for long-term volume maintenance).
The All-on-X Protocol Step by Step
Comprehensive consultation & 3D planning:
CBCT scan, intraoral scan, digital smile design and full-arch treatment plan. We pre-plan every implant position virtually.
Surgical phase:
Under local anaesthesia (and optionally light sedation), we extract any remaining unrestorable teeth, place the implants in the digitally planned positions — often with a surgical guide — and add bone graft where needed.
Immediate temporary bridge (same day):
Where possible, a pre-fabricated PMMA bridge is screwed onto the implants the same day. You leave with teeth — not gauze.
Healing & soft diet phase:
Soft diet for 6–8 weeks. Most patients return to almost normal activities within 3–5 days.
Final bridge (3–6 months later):
Once integration is confirmed, the definitive bridge — zirconia, hybrid or porcelain — is delivered. This is the long-term restoration.
Long-term maintenance:
Professional cleaning every 4–6 months. Annual review with X-rays. A well-cared-for All-on-X bridge can last 15–25+ years
Membranes — The Other Half of Bone Grafting
A bone graft is usually covered by a membrane that protects it from the overlying soft tissue and prevents fast-growing gum cells from invading the area before bone can form. This technique is called Guided Bone Regeneration (GBR).
- Resorbable membranes (e.g. collagen) — dissolve on their own, no second surgery needed
- Non-resorbable membranes (e.g. PTFE-titanium reinforced) — used in larger 3D defects, removed at a later appointment
- Custom titanium mesh — for major bone reconstruction in extensive defects
PRF — Platelet-Rich Fibrin
A small sample of your own blood is drawn at the start of the procedure and centrifuged to concentrate platelets and growth factors. The resulting PRF is mixed with the graft or used as a biological membrane. It accelerates healing, reduces post-op swelling and supports better bone formation — entirely from your own body, with no foreign material involved.
Block Graft vs Particulate Graft
Particulate grafts (small granules):
Used for small-to-medium defects, around implants, and inside sockets. Easy to shape, very versatile.
Block grafts (solid pieces of bone):
Used for larger defects requiring significant volume restoration in 3 dimensions. The block is secured with tiny screws and covered with a membrane. Healing takes 4–6 months before the implant can be placed.
Typical Healing Timeframes
- Small graft around an implant (simultaneous placement): no extra time — heals during the standard 3–6 months of osseointegration
- Socket preservation graft after extraction: 3–4 months before implant placement
- Moderate ridge augmentation: 4–6 months
- Major block graft or sinus lift: 6–9 months
Is Bone Grafting Safe?
Yes — modern bone grafting is a well-established, highly predictable procedure with success rates above 90%. All processed materials we use are CE-marked and rigorously screened. Where autograftis used, it’s your own bone — the most biocompatible material possible.
Sinus Lift — Open and Closed Techniques
What Is Sinus Lift — Open and Closed Techniques?
The upper back jaw (where the molars and premolars sit) is the most common area to need bone augmentation, because the maxillary sinus — an air-filled cavity above the upper teeth — tends to expand downward after tooth loss, leaving less and less bone for an implant. A sinus lift gently elevates the sinus membrane and adds bone underneath, creating room for a long, secure implant. At Dentistar, we use two distinct sinus lift techniques. The right choice depends on how much bone you already have and how much we need to gain.
Closed Sinus Lift (Crestal / Transcrestal / Osteotome Technique)
When it’s used:
When you have at least 5–7 mm of bone below the sinus and need to gain only 2–4 mm of extra height. This is the most common — and least invasive — sinus augmentation technique.
How it works:
We access the sinus through the same small hole prepared for the implant. Using specialised osteotomes (or hydraulic/balloon kits), we gently push bone graft material up through the implant socket, lifting the sinus membrane just enough to create extra space. The implant is then placed in the same appointment.
- Benefits:
- Minimally invasive — no extra incision needed
- Implant placed in the same visit as the sinus lift
- Less swelling, less discomfort, faster recovery
- Shorter overall treatment time
- Lower cost than the open technique
Recovery:
Similar to a standard implant — mild swelling for 2–3 days, return to work the next day, soft diet fora few days. Most patients describe it as a routine implant placement with very little additional discomfort.
Open Sinus Lift (Lateral Window Technique)
When it's used:
When you have less than 5 mm of bone below the sinus or need to gain more than 4 mm of height. This is the technique of choice for severe bone loss — common in patients who have been missing upper back teeth for years.
Closed Sinus Lift (Crestal / Transcrestal / Osteotome Technique)
How it works:
We create a small window in the side wall of the upper jaw, above the gum line. Through this window, we carefully lift the sinus membrane and pack bone graft material into the newly created space. The window is then covered with a membrane and the gum stitched back. After 6–9 months of healing, the new bone is mature enough to support an implant.
- Simultaneous vs Staged Implant Placement:
- Simultaneous (1 surgery): If at least ~4 mm of native bone remains for initial implant stability, the implant can be placed at the same time as the sinus lift
- Staged (2 surgeries): If native bone is too thin, the sinus lift is performed alone first; the implant is placed 6–9 months later, once new bone has formed
- Benefits:
- Predictable, high-success technique even in extreme bone loss
- Creates substantial new bone — often 10+ mm of new height
- Allows implants to be placed where they otherwise wouldn't be possible
- Avoids the need for short implants or compromised positioning
Recovery:
Slightly longer than the closed technique. Mild-to-moderate swelling for 3–7 days, instructions to avoid blowing the nose or sneezing with a closed mouth for 1–2 weeks (to protect the sinus membrane), soft diet for about a week. Antibiotics are routinely prescribed.
Open vs Closed Sinus Lift — At a Glance
- Closed (crestal) sinus lift:
- Bone available: 5–7+ mm
- Bone to gain: up to 4 mm
- Approach: through the implant site
- Implant placed: same visit
- Recovery: ~3 days
- Cost: lower
- Open (lateral window) sinus lift::
- Bone available: <5 mm
- Bone to gain: 5–10+ mm
- Approach: through a small side window
- Implant placed: same visit or after 6–9 months
- Recovery: 5–7 days
- Cost: higher
Risks & How We Minimise Them
- Sinus membrane perforation: rare with experienced hands; if it happens, we repair it with a collagen membrane and continue safely
- Post-op sinus infection: minimised with antibiotics, careful sinus hygiene instructions, and avoiding nose-blowing for 1–2 weeks
- Bone graft contamination: prevented with sterile technique and modern barrier membranes
- Implant failure: rates with proper sinus lift are comparable to standard implants (95%+ success)
Bone Grafting & Sinus Lifts at Dentistar — Why It Matters
Many patients are told they “can’t have implants” because of bone loss. With modern bone grafting and sinus lift techniques, that is rarely true. At Dentistar, we routinely rehabilitate cases that other clinics consider impossible — by combining digital planning, the right graft material for the situation, and the right surgical technique.
Caring for Your Implant
- Brush twice daily, just like natural teeth
- Daily flossing or interdental brushes
- Professional cleaning every 4–6 months
- Avoid smoking (it reduces implant success and lifespan)
- Night guard if you grind your teeth
Cases
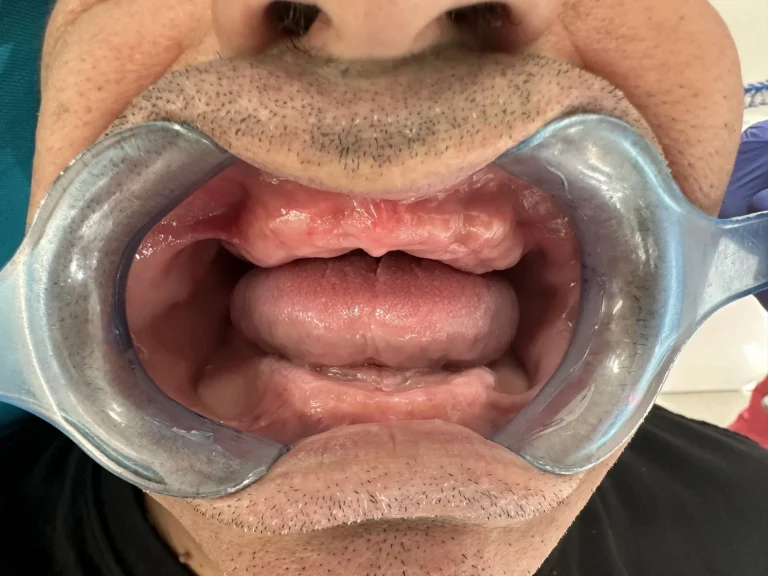
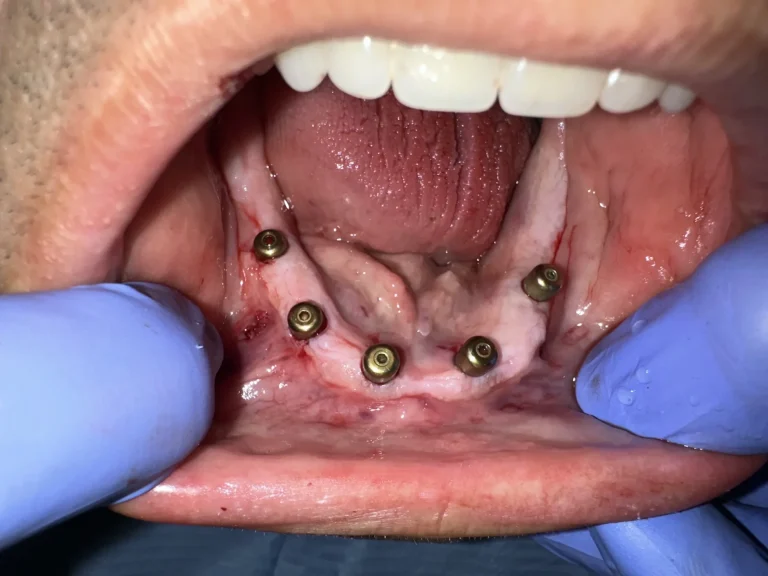
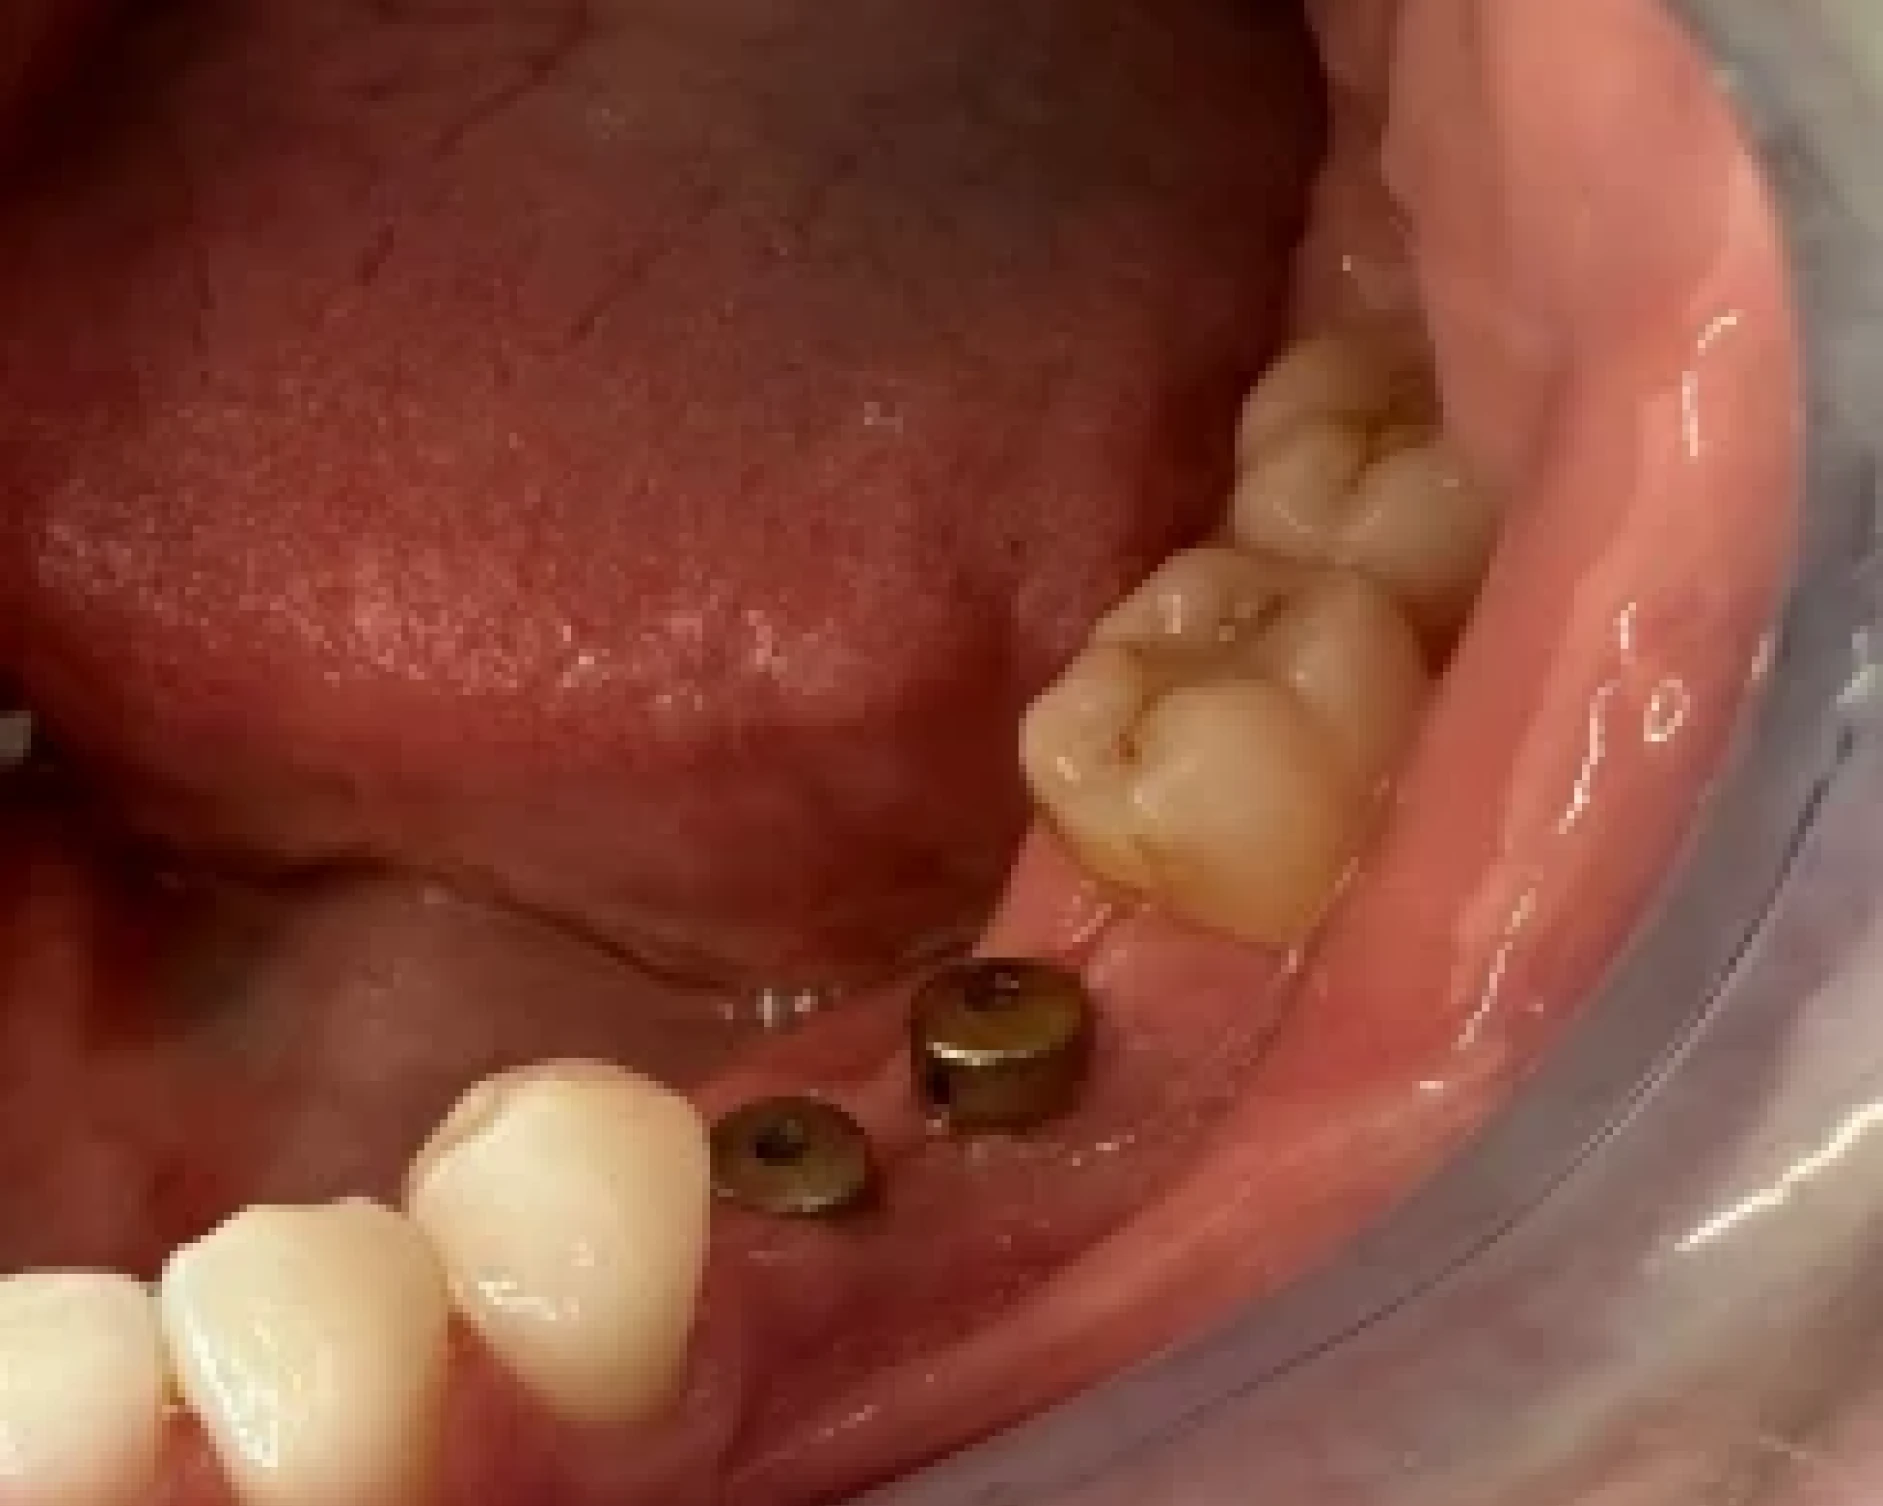
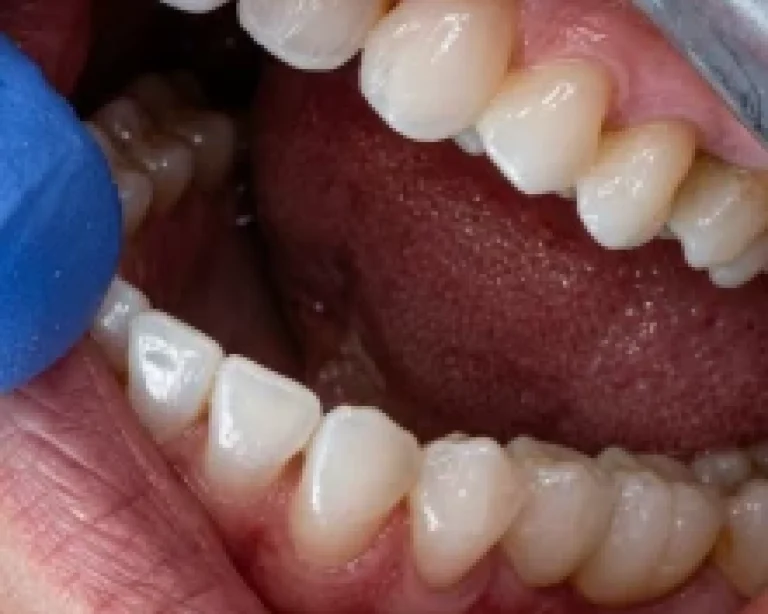
Everything You Need to Know
Frequently Asked Questions (FAQ)
Does implant placement hurt?
No. The procedure is performed under local anaesthesia and is completely painless. There may be mild swelling or discomfort for 2–3 days afterwards, managed with common painkillers. With guided surgery (flapless), discomfort is even less.
How long does a dental implant last?
With proper oral hygiene and regular check-ups, an implant can last 15–25 years or lifelong. Thecrown on top may need replacement after 10–15 years.
What is a surgical guide?
It’s a custom-made, 3D-printed guide that fits in your mouth and directs the implant with millimetre precision to the pre-planned position. It’s made based on your 3D X-ray and digital impression, and is used in complex and demanding cases.
Can I have a tooth removed and an implant placed in the same session?
Yes — this technique is called immediate extraction and immediate implant placement. In selected cases (good bone quality, no infection, good initial stability), we can even fit a temporary crown on the same day so you’re not without a tooth. Suitability is assessed with a 3D X-ray before the procedure.
Am I a suitable candidate for implants?
Most adults with healthy gums and adequate bone are suitable. Diabetic patients, those with osteoporosis or smokers require careful evaluation. Patients with significant bone loss can usually still receive implants — with bone grafting or a sinus lift. At Dentistar, the initial assessment determines if and how we can proceed.
How much does a dental implant cost in Cyprus?
Cost depends on the number of implants, the type of restoration, whether bone grafting is needed and whether guided technique is applied. At Dentistar, you receive a clear and transparent quote after digital planning.
How long does the whole process take?
With the classic approach, 3–6 months. With immediate extraction and immediate implantation ,total duration can be reduced by 2–4 months. In immediate loading cases, you receive a temporary crown the same day. For cases requiring an open sinus lift, total timeline may be 9–12 months.
What is the difference between All-on-4, All-on-6 and All-on-8?
They all replace a full arch of teeth, but use different numbers of implants. All-on-4 uses 4 implants per jaw (two angled at the back) and is the most established and often most affordable option. All-on-6 uses 6 implants for greater stability — preferred for bruxers or where bone allows. All-on-8 is used in selected upper jaws where bone is sufficient. We choose the right option together based on your bone, bite forces, aesthetic goals and budget.
Was I told I don't have enough bone for implants — is there really nothing that can be done?
In most cases, yes — there is something we can do. Modern bone grafting (autograft, allograft, xenograft, synthetic) and sinus lifts (closed or open) can rebuild bone in nearly any area of the jaw. At Dentistar we routinely treat cases that have been declined elsewhere. A 3D X-ray and consultation will tell us — and you — exactly what’s possible.
What's the difference between a closed and open sinus lift?
A closed (crestal) sinus lift is performed through the same hole as the implant and is used when only 2–4 mm of extra bone is needed — it’s quicker, less invasive and the implant goes in the same visit. An open (lateral window) sinus lift is used for more severe bone loss (less than 5 mm of bone available) and creates substantial new bone through a small window in the side of the jaw. It takes longer, requires more healing, but allows implants where they would otherwise be impossible.
Will I need a bone graft for my implant?
Many patients don’t — modern planning often allows implant placement without grafting. When bone is insufficient, we recommend the smallest, most targeted graft possible. We’re always honest with you: if grafting can be avoided safely, we’ll avoid it. If it’s needed, we’ll explain exactly why, which material we’ll use, and what your healing will look like.
Ready to Book Your Appointment?
Contact us today to schedule your visit and take the first step toward a healthier smile.